

ASM Disks
As a brief overview, Oracle Automatic Storage Management (ASM) is an integrated, high-performance database file system and disk manager. More information on this can be found on the official documentation here.
Outline
The purpose of this post is to show how to add more disk space to an existing ASM system. This is a common enough procedure on Unix based systems, but on Windows, there are some additional steps to be aware of.
- Add disk space
- Create Logical Partitions
- Label the Partitions
- Add to ASM Storage
- Verify partitions were added
Add Disk Space in Windows
Adding disk space depends on how the system is set up. If this is a VM, then it might simply be a matter of mounting a new disk. If a physical device needs to be added, then we’d have to ensure it is compatible.
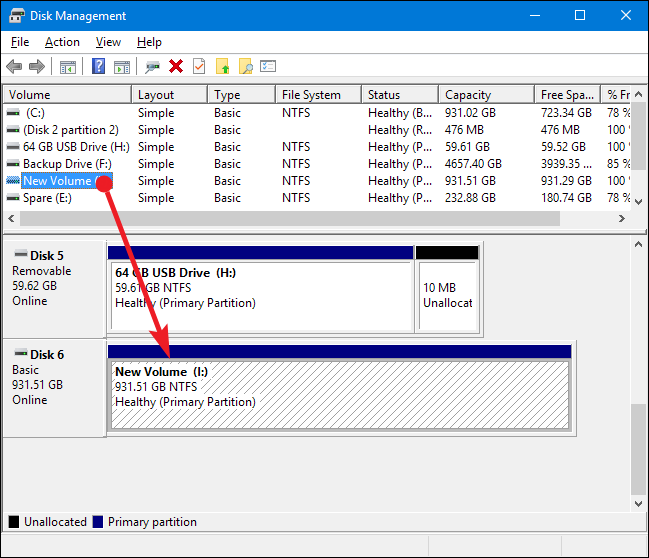
For the purposes of this post, and from my testing, we are going to assume the space has already been added to the VM. Once the disk has been added, it should be listed as a New Volume, and show up as a Basic Drive.
Check current space in Windows Disk Management:
Create Logical partitions
Now that we have the disk space added to the machine, we have to create logical partitions. Oracle ASM only works on partitioned disks in Windows.
The only partitions that OUI displays for Windows systems are logical drives that are on disks and have been marked (or stamped) with asmtool or by Oracle ASM Filter Driver.
1.) Open Command Prompt using “Run as Administrator”
2.) Start diskpart tool
1
c:/> diskpart
3.) Verify current disks
1
2
3
4
5
6
7
8
9
DISKPART> list disk
Disk ###  Status         Size     Free     Dyn  Gpt

--------  -------------  -------  -------  ---  ---
Disk 0    Online           60 GB  1024 KB
Disk 1    Online          155 GB  1024 KB   *
Disk 2    Online           40 GB  5120 KB
Disk 3    Online          120 GB  2048 KB
Disk 4    Online          100 GB  1022 MB
Disk 5    Online           50 GB    50 GB
4.) Select the disk we added. In this example, it will be disk 5 (disregard the volumes in the image from Step 2). We can also list partitions, but there shouldn’t be any.
1
2
3
4
5
DISKPART> select disk 5
Disk 5 is now the selected disk.

DISKPART> list partition
There are no partitions on this disk to show.
5.) Create an extended partition. This will set the space as available free space.
1
2
3
4
5
6
7
DISKPART> create partition extended
DiskPart succeeded in creating the specified partition.

DISKPART> list partition
Partition ###  Type              Size     Offset

-------------  ----------------  -------  -------
* Partition 0    Extended            49 GB  1024 KB
6.) Create logical partitions of size 10GB. In this instance, we will use up the 50GB space by creating 4 partitions of size 10GB and the final one as 9GB.
1
2
3
4
5
6
7
8
9
10
11
12
13
14
15
16
DISKPART> create partition logical size=10240
DiskPart succeeded in creating the specified partition.
..................

DISKPART> create partition logical size=9216
DiskPart succeeded in creating the specified partition.

DISKPART> list partition
  Partition ###  Type              Size     Offset

  -------------  ----------------  -------  -------
  Partition 0    Extended            49 GB  1024 KB
  Partition 1    Logical             10 GB  2048 KB
  Partition 2    Logical             10 GB    10 GB
  Partition 3    Logical             10 GB    20 GB
  Partition 4    Logical             10 GB    30 GB
* Partition 5    Logical              9 GB    40 GB
Add labels to the Partitions
We will be using asmtool to label the partitions, but you can also use the GUI interface asmtoolg.
1.) Go to the ASM binaries directory and list current labels. It can look similar to below:
1
2
3
4
5
6
7
8
9
10
11
12
c:/> cd c:\test\app\oracle\product\11.2.0\grid\bin
C:\test\app\oracle\product\11.2.0.4\grid\BIN>asmtool -list
NTFS                             \Device\Harddisk0\Partition1              100M
NTFS                             \Device\Harddisk0\Partition2            61337M
ORCLDISK0                        \Device\Harddisk2\Partition1            10240M
ORCLDISK1                        \Device\Harddisk3\Partition4            10240M
ORCLDISK2                        \Device\Harddisk4\Partition11           10240M
                                 \Device\Harddisk5\Partition1            10240M
                                 \Device\Harddisk5\Partition2            10240M
                                 \Device\Harddisk5\Partition3            10240M
                                 \Device\Harddisk5\Partition4            10240M
                                 \Device\Harddisk5\Partition5             9216M
2.) You may notice we have the 5 partitions we just created not labelled above. We can now add labels using the label prefix ORCLDISK
1
2
3
C:\test\app\oracle\product\11.2.0.4\grid\BIN>asmtool -addprefix ORCLDISK \Device\Harddisk5\Partition1
.....
C:\test\app\oracle\product\11.2.0.4\grid\BIN>asmtool -addprefix ORCLDISK \Device\Harddisk5\Partition5
3.) Verify the new labels
1
2
3
4
5
6
7
8
9
10
11
C:\test\app\oracle\product\11.2.0.4\grid\BIN>asmtool -list
NTFS                             \Device\Harddisk0\Partition1              100M
NTFS                             \Device\Harddisk0\Partition2            61337M
ORCLDISK0                        \Device\Harddisk2\Partition1            10240M
ORCLDISK1                        \Device\Harddisk3\Partition4            10240M
ORCLDISK2                        \Device\Harddisk4\Partition11           10240M
ORCLDISK3                        \Device\Harddisk5\Partition1            10240M
ORCLDISK4                        \Device\Harddisk5\Partition2            10240M
ORCLDISK5                        \Device\Harddisk5\Partition3            10240M
ORCLDISK6                        \Device\Harddisk5\Partition4            10240M
ORCLDISK7                        \Device\Harddisk5\Partition5             9216M
Add the partitions to ASM Storage
1.) Log in to the ASM instance and check current Disks
- New disk partition will have group_number=0
1
2
3
4
5
6
7
8
9
10
11
12
SQL> col path for a50
SQL> select group_number, header_status, name, label, path from v$asm_disk order by 1, 2;
GROUP_NUMBER HEADER_STATU NAME                           LABEL                           PATH
------------ ------------ ------------------------------ ------------------------------- --------------------------------------------------

           0 PROVISIONED                                                                 \\.\ORCLDISK3
           0 PROVISIONED                                                                 \\.\ORCLDISK4
           0 PROVISIONED                                                                 \\.\ORCLDISK6
           0 PROVISIONED                                                                 \\.\ORCLDISK5
           0 PROVISIONED                                                                 \\.\ORCLDISK7
           2 MEMBER       DATA_0001                                                      \\.\ORCLDISK1
           2 MEMBER       DATA_0000                                                      \\.\ORCLDISK0
           2 MEMBER       DATA_0002                                                      \\.\ORCLDISK2
2.) Add the new storage to the required diskgroup
1
2
3
SQL> alter diskgroup DATA add disk '\\.\ORCLDISK3';
..........
SQL> alter diskgroup DATA add disk '\\.\ORCLDISK7';
3.) Verify partitions were added and the diskgroup has more space
1
2
3
4
5
6
7
8
9
10
11
12
13
14
15
16
SQL> select group_number, header_status, name, label, path from v$asm_disk order by 1, 2;
GROUP_NUMBER HEADER_STATU NAME                           LABEL                           PATH
------------ ------------ ------------------------------ ------------------------------- --------------------------------------------------

           0 MEMBER       DATA_0003                                                      \\.\ORCLDISK3
           0 MEMBER       DATA_0004                                                      \\.\ORCLDISK4
           0 MEMBER       DATA_0006                                                      \\.\ORCLDISK6
           0 MEMBER       DATA_0005                                                      \\.\ORCLDISK5
           0 MEMBER       DATA_0007                                                      \\.\ORCLDISK7
           2 MEMBER       DATA_0001                                                      \\.\ORCLDISK1
           2 MEMBER       DATA_0000                                                      \\.\ORCLDISK0
           2 MEMBER       DATA_0002                                                      \\.\ORCLDISK2

SQL> select name, round(total_mb/1024,0) total_gb, round(free_mb/1024,0) free_gb from v$asm_diskgroup;
NAME                             TOTAL_GB    FREE_GB
------------------------------ ---------- ----------

DATA                                   79         50